

How To Remove Yellow Tint From Photos Photoshop
In this tutorial, you lot volition learn how how to hands remove colour casts in Photoshop using the Camera Raw Filter.
To Neutralize the epitome nosotros will use the White Residue Tool (Eyedropper Tool), and and so utilize the Tonal sliders to control the luminosity of the photo.
Table of contents
- What is a Color Cast?
- Remove Color Casts in Photoshop
- Enhancing the Epitome
What is a Color Bandage?
A color cast is an unwanted color tint that appears over your photo. Color casts tin can ascend for several reasons, including the wrong settings on your photographic camera, or shooting nether the wrong type of light.
Whatever the cause of your color cast is, there will always be a simple solution in Photoshop!
Remove Color Casts in Photoshop
To remove the color bandage, right-click on the prototype layer and select Convert to Smart Object.
Note: A Smart Object is a container that tin hold one or more than layers. Information technology allows you lot to employ editable adjustments, distortions, filters, and transformations.
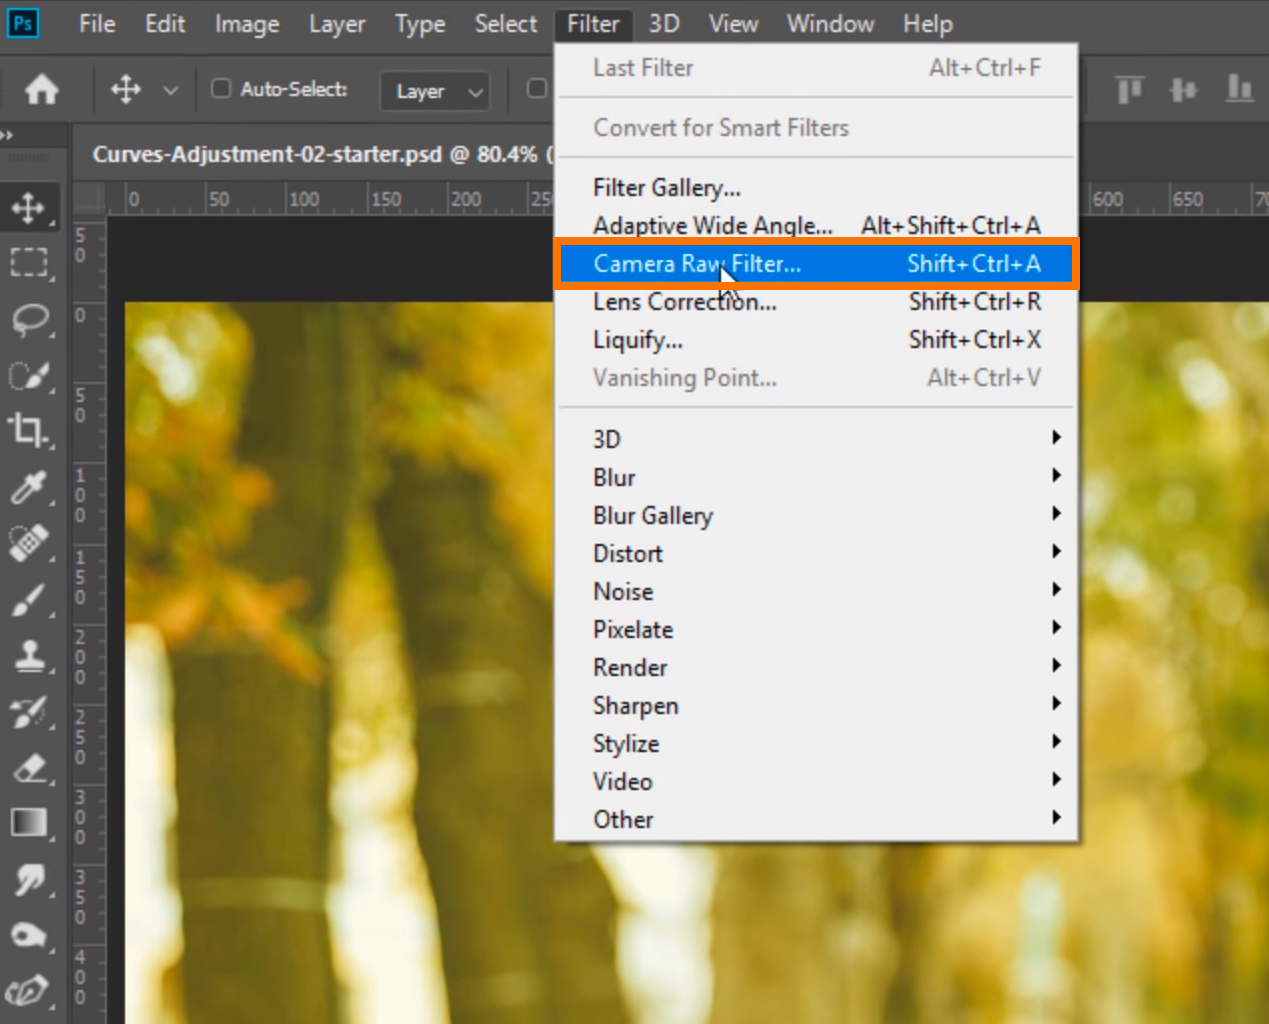
Then, get to Filter > Photographic camera Raw Filter.
On the Tools bar, select the White Balance tool or you may know this every bit the Eye-Dropper tool.

Find a neutral gray area inside the image and click on it. A neutral gray is simply a grayness that should not have a tint on information technology.
In this image, yous can click on: the dark part of the backpack, the brick pathway, or the model's top since they are all items that should be a neutral grayness and should not have a color cast.
Upon clicking on the gray areas, y'all will notice how the color bandage will immediately exist replaced with a white counterbalanced image.
If you don't get the results that you want, try to click on different areas of your image to run across which gives you the best results.
Learn how to Match Colors on Photoshop!
Enhancing the Image
Correcting the white balance can't guarantee a picture-perfect photo yet and you may need to set the necessary adjustments to achieve the perfect consequence.
To improve the lightness and the darkness of the image, conform the Exposure, Dissimilarity, Clarity, Highlights, and Shadows.
You can proceed to enhance the colors of the paradigm or the skin tone past adjusting the Saturation and Vibrance.
That's information technology for today's 90-2d Tips on how to remove a color cast in Photoshop!
Subscribe to our YouTube Channel to get the notifications on new episodes in this 90-Second Photoshop Tips serial.
Terminal Epitome
Drag The Slider To See Before & Later on


Source: https://photoshoptrainingchannel.com/remove-color-cast-in-photoshop/
Posted by: fordgodder.blogspot.com
0 Response to "How To Remove Yellow Tint From Photos Photoshop"
Post a Comment